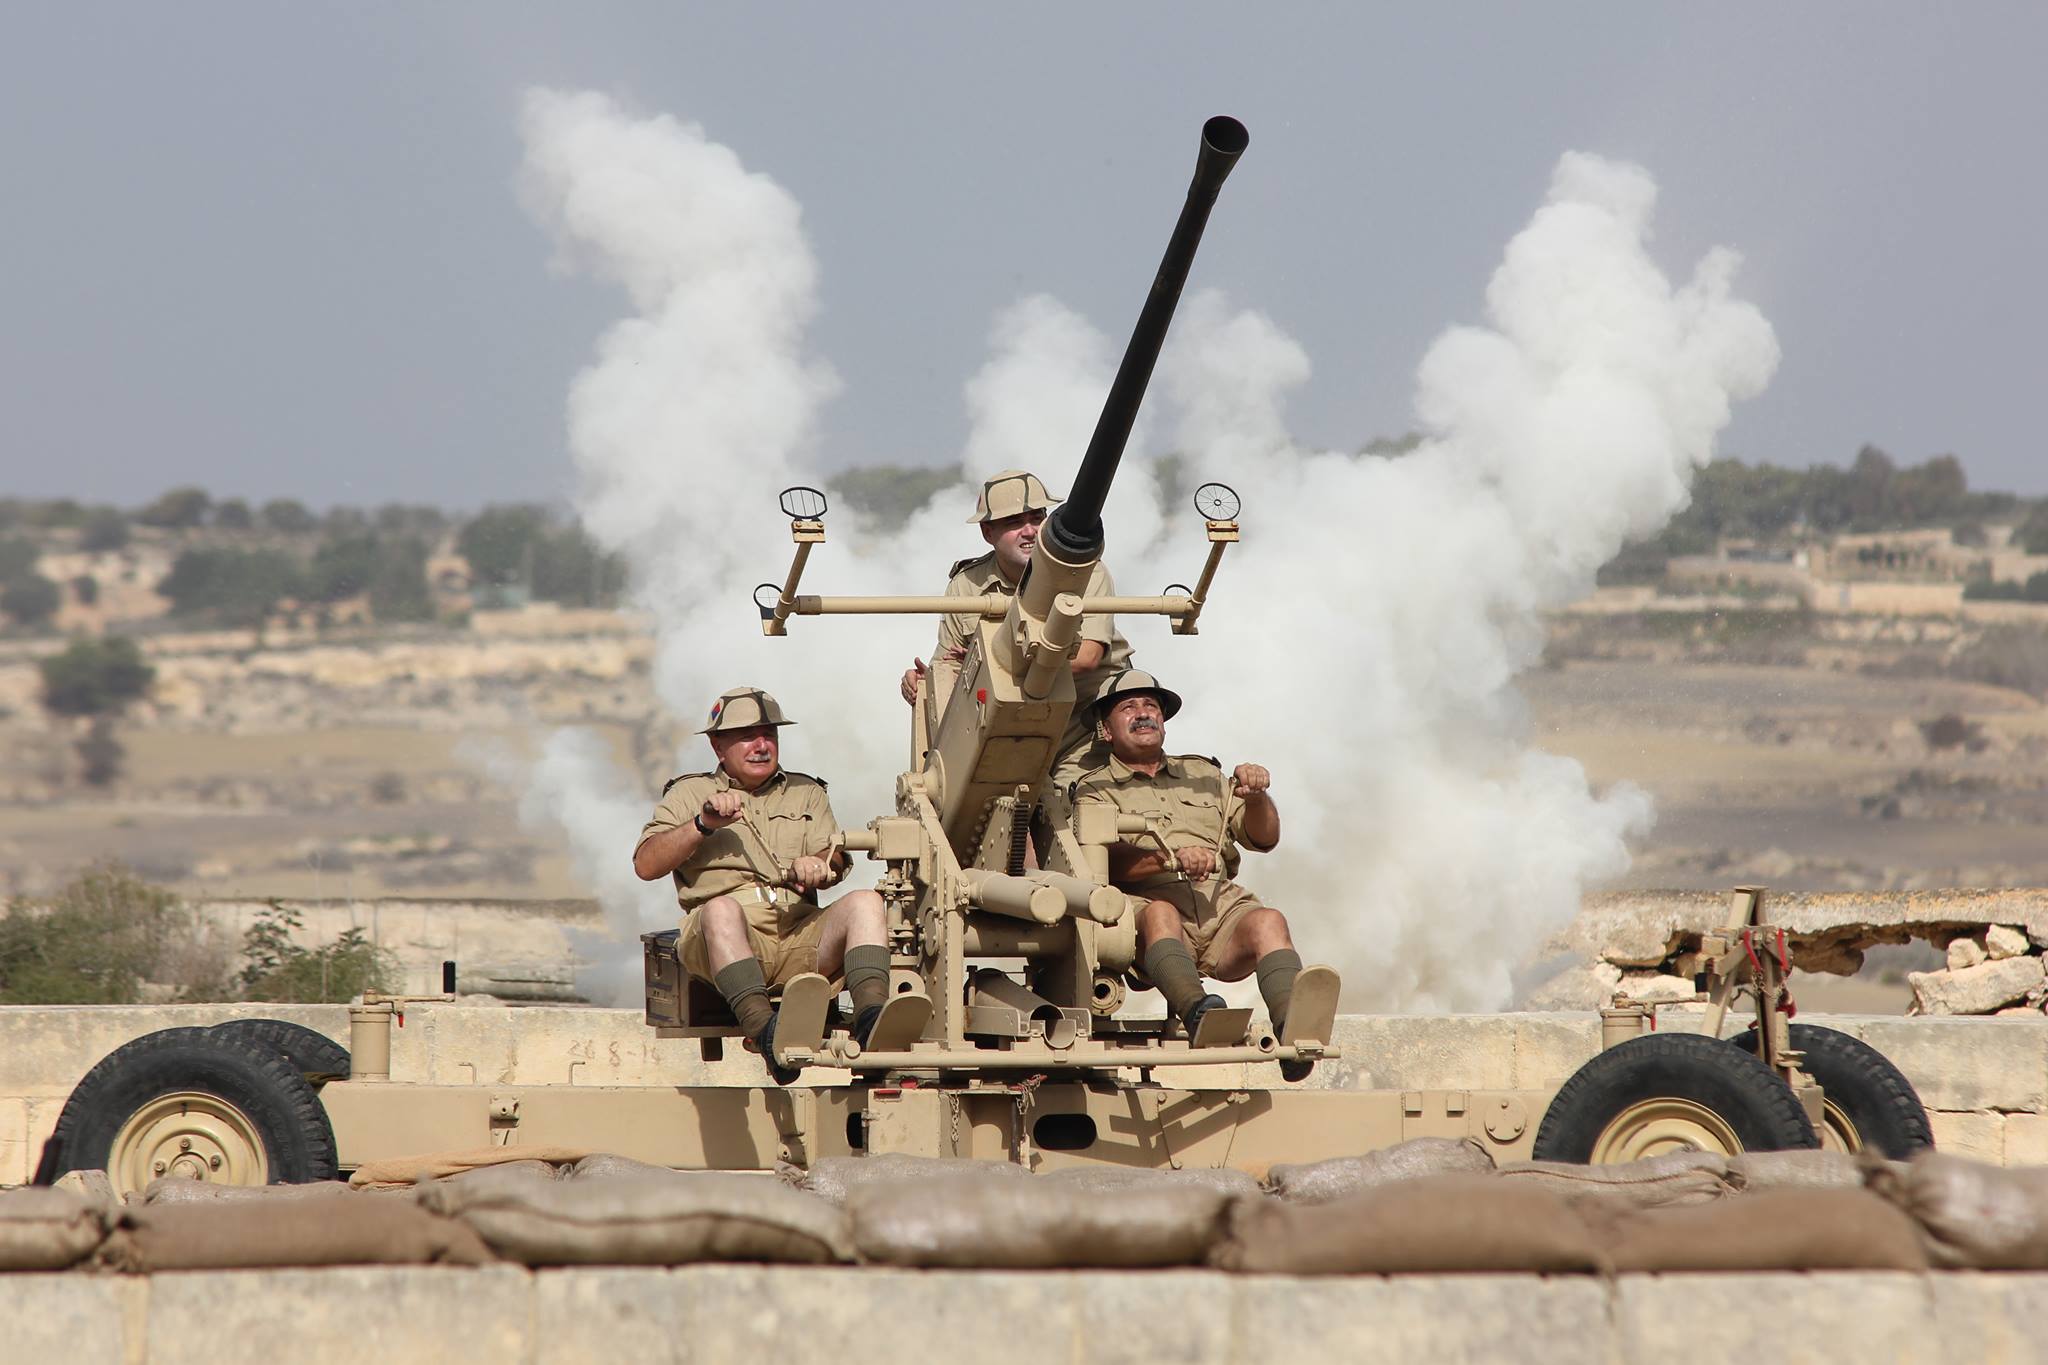
The principal fighting weapon of the 3rd Light Anti-Aircraft Regiment, Royal Malta Artillery, was the 40mm Bofors gun. This gun was developed in the early 1930’s by the Swedish firm Bofors AB. The Anti-Aircraft guns used in WW 1 were of fairly large calibre, and it was realised that a requirement existed for a gun of a lighter calibre, to fill the gap between the heavy guns and the much lighter machine guns. This is how the Bofors 40mm AA gun came into being.
On the 23rd April1937 the British, highly impressed by demonstrations of the Bofors gun, decided to buy 100 of these guns along with 500,000 rounds of ammunition. By the end of the year another 180 were ordered, and an agreement was signed authorising manufacture in England. Meanwhile in 1939 a further 179 were ordered, and not too soon as events were to prove in September!
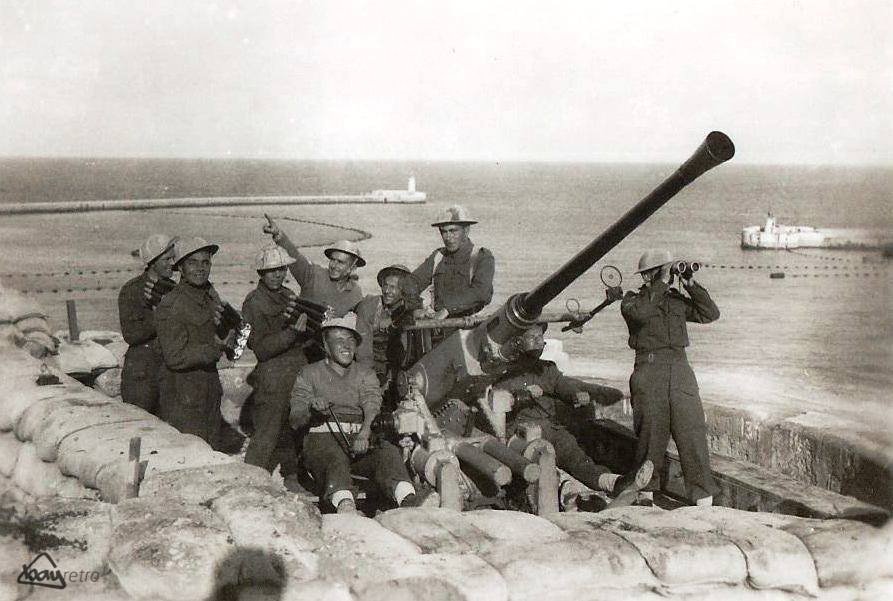
At least one (and possibly more) of these guns were sent to Malta in 1939, as evidenced by photos of one participating in the King’s Birthday parade held in the streets of Valletta on 10th June 1939. Many more were to follow….
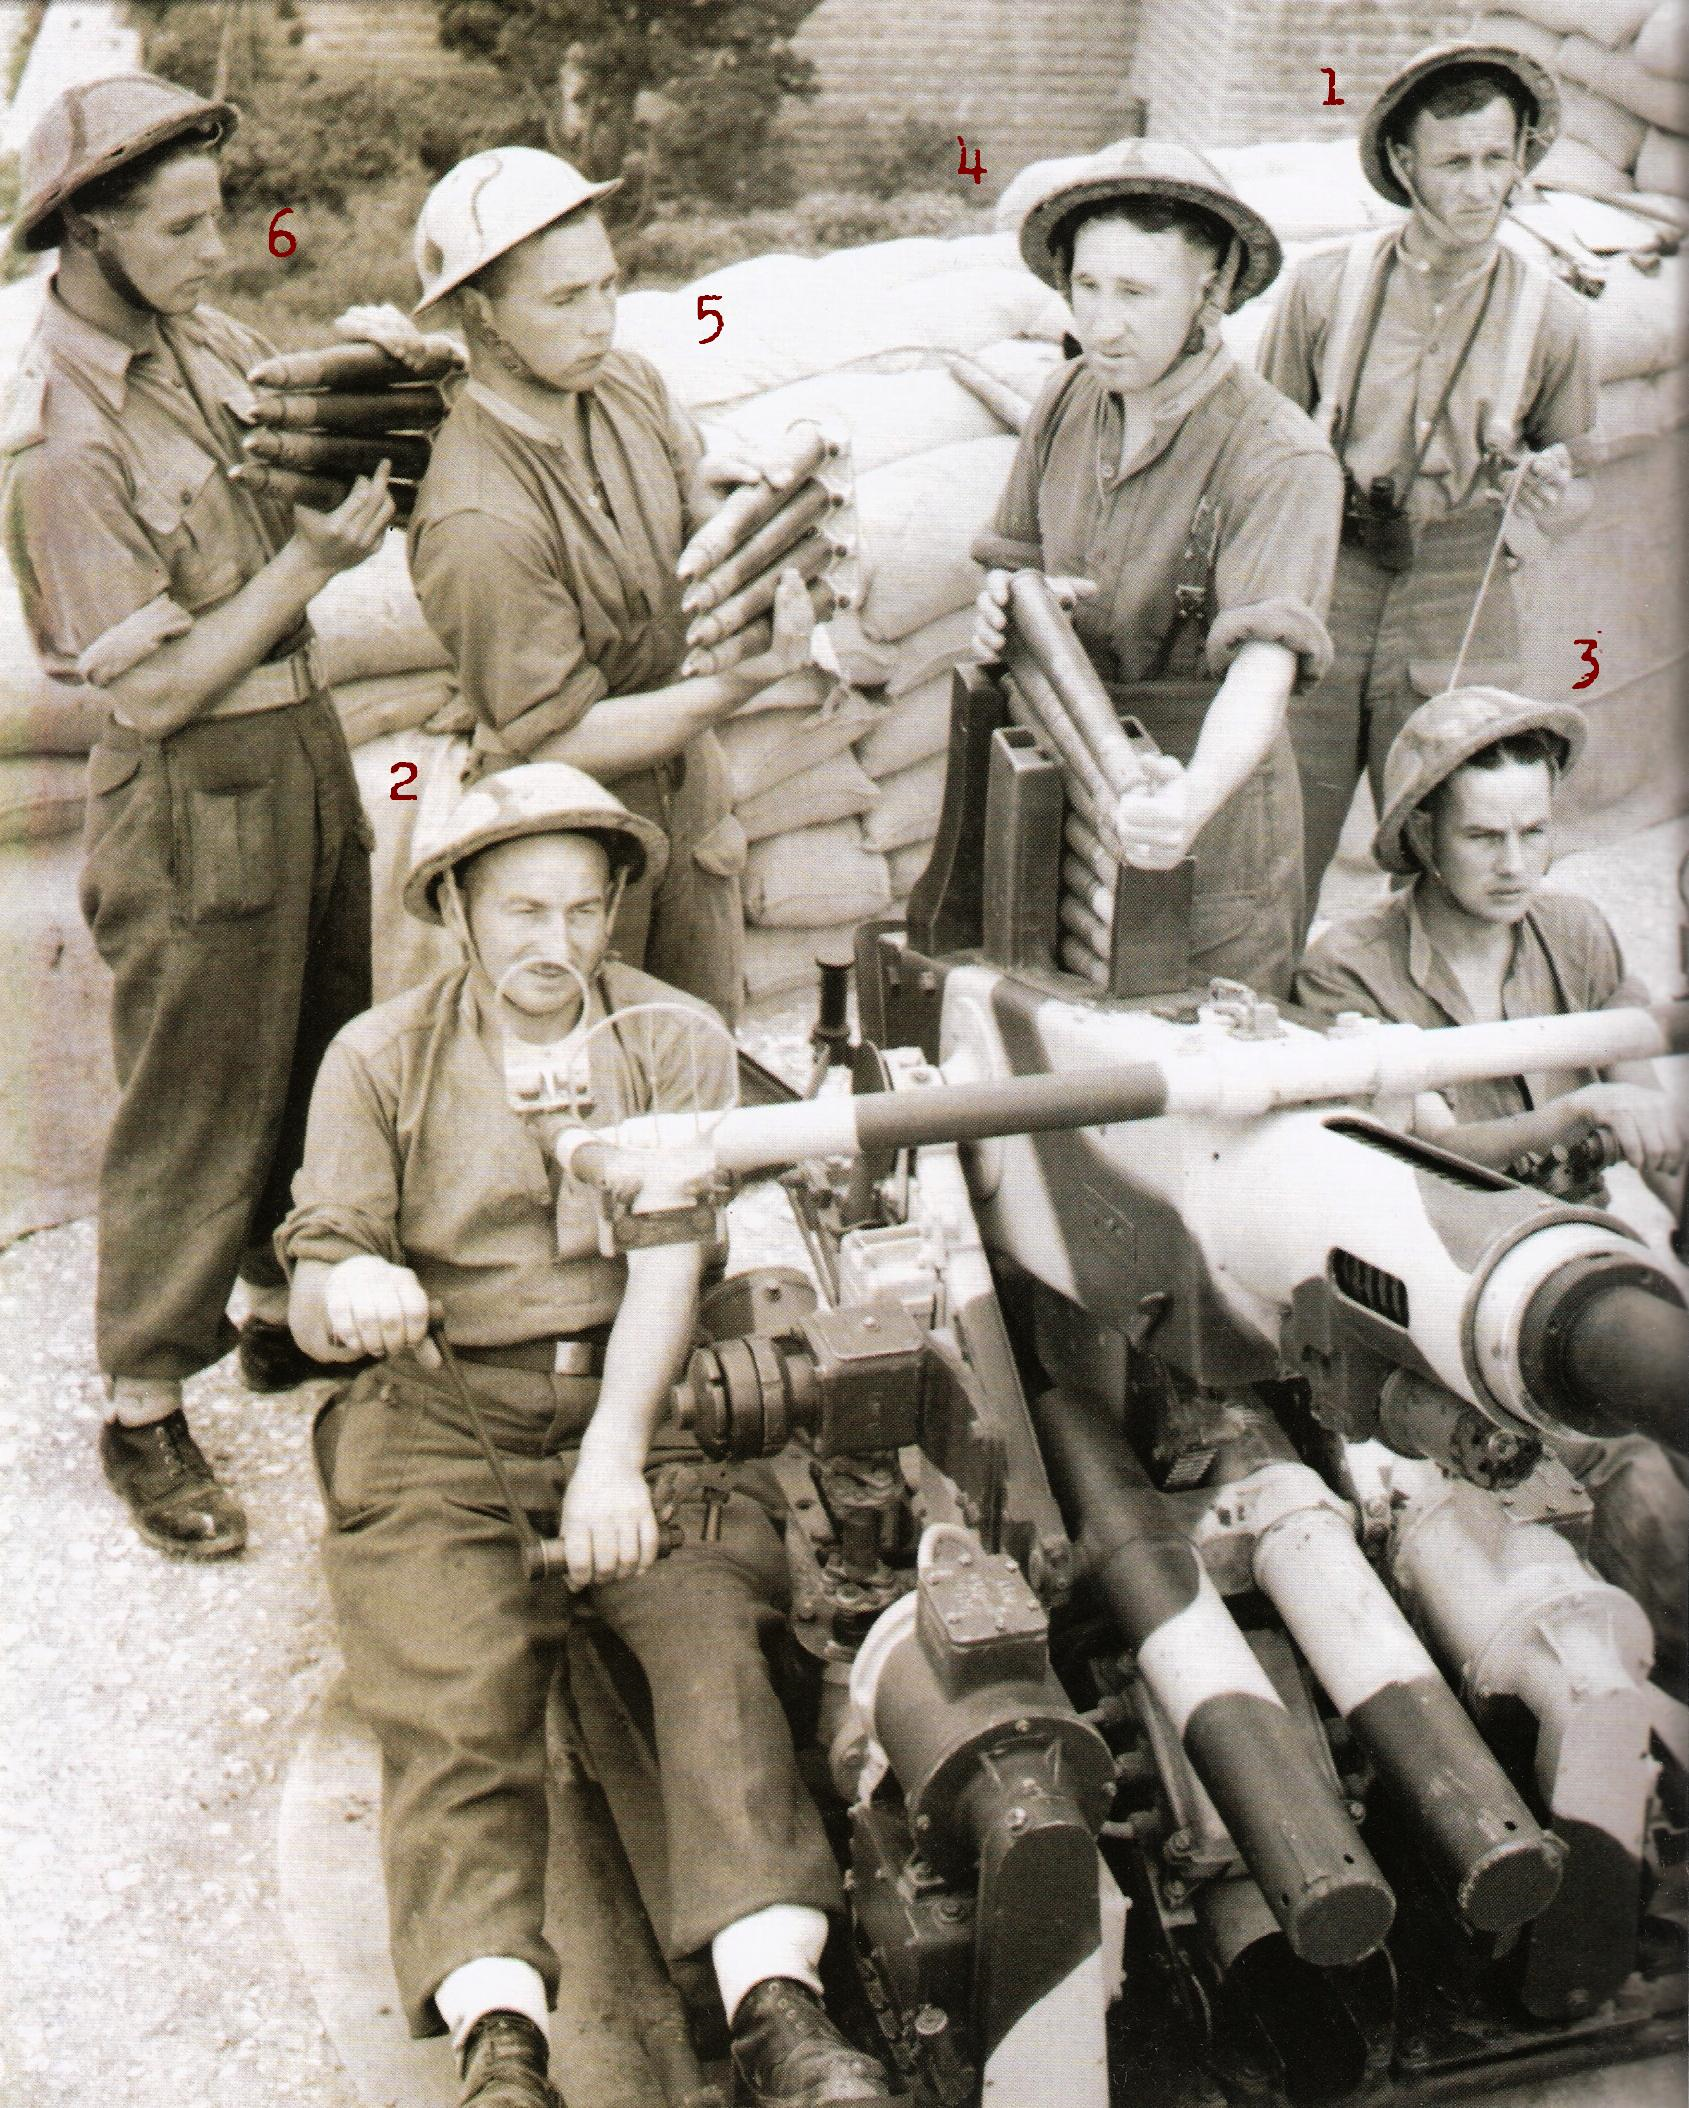
The Gun Crew
The Bofors guns manufactured in England, and later Canada, Australia and the USA, were fitted with 2 electric motor / oil units that could be engaged instead of the hand-wheels to turn / elevate the gun. These movements were controlled from a distance by a Kerrison Predictor. This would be ‘aimed’ at the target, and data about the target inputted manually. The predictor would mechanically work out the ‘future position’ of the target and control the oil units ( hydraulic pump/motor ) to make them turn and elevate / depress the gun so that the barrel would be aimed at the ‘future position’ of the target.
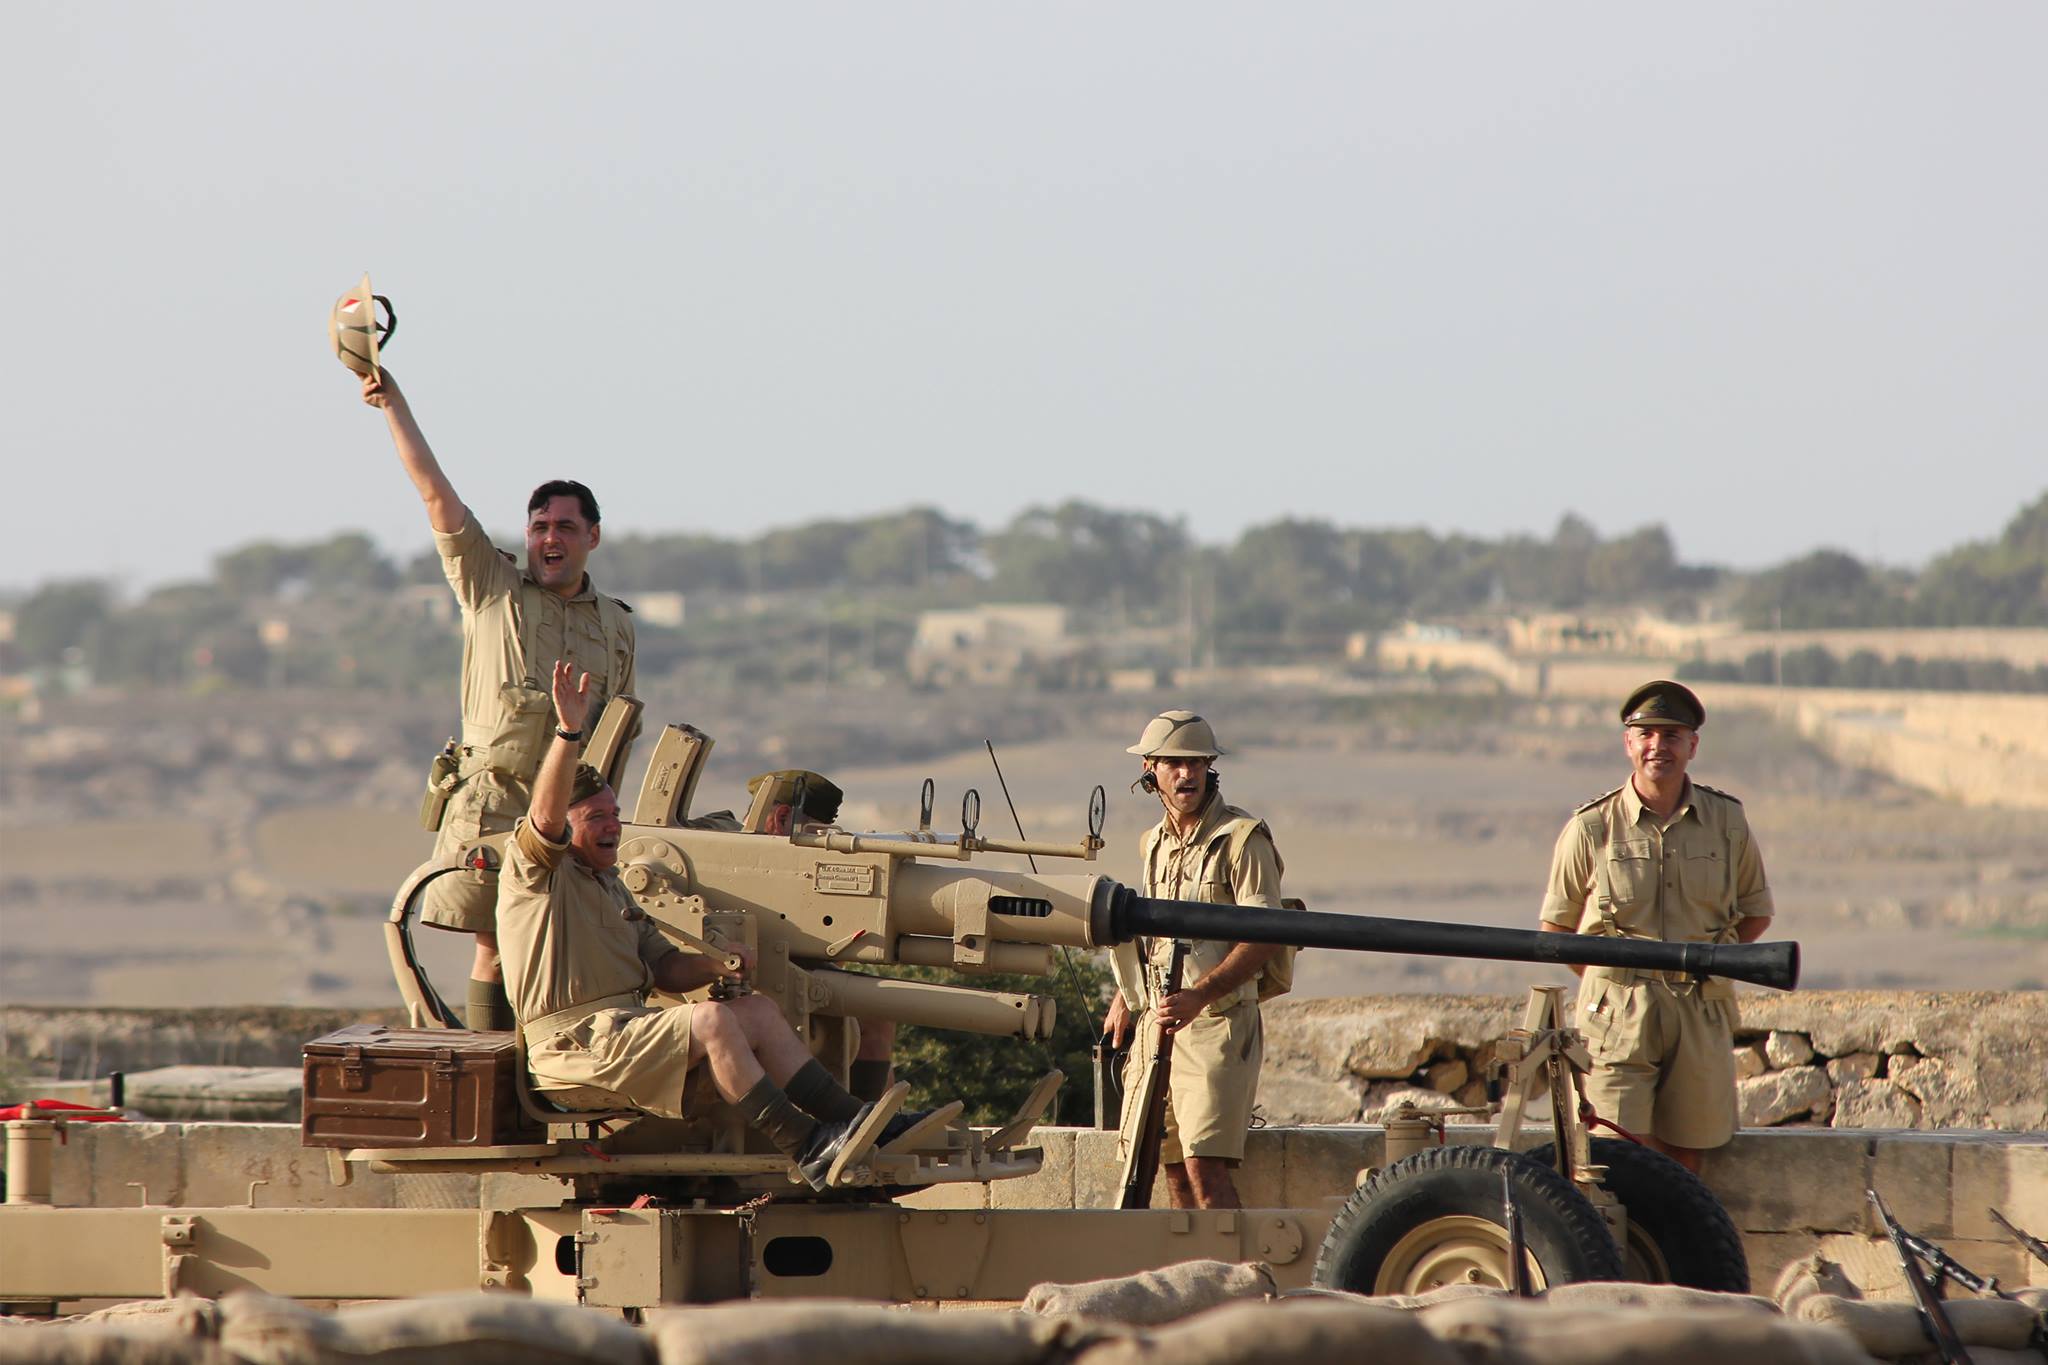
According to the ‘1940 provisional Gun Drill’ for the Bofors, ten personnel manned each gun + predictor unit.Only the loader would be on the gun to feed rounds into the autoloader, and to fire the gun using his foot pedal. Pretty advanced for 1939!!
But despite all this technology, when a veteran Malta Bofors Gunner was asked he replied “We preferred using the gun at hand control, using the sights. It was more personal, more satisfying! And anyway, the generator supplied to power the system was a pig to start!”
This ‘return to basics’ must have been widespread, as in the ‘1942 Gun Drill’ book, the predictor is given less importance, and details are given of what the seven men making up the crew at ‘gun control’ (‘hand’ control ) would be doing.
Each was given a number and each had a designated role:-
Number | Task | Rank |
1 | Gun Commander | Seargent |
2 | Gun Layer (line) | Lance Bombardier |
3 | Gun Layer (elevation) | Gunner |
4 | Gun Loader & Firer | Gunner |
5 | Ammunition Supply | Gunner |
6 | Ammunition Supply | Gunner |
7 | Deputy to Nr. 1 | Bombardier |
Operating System
The Bofors gun was recoil operated with a vertical sliding breechblock mechanism. Four rounds in a clip were fed into the gun’s autoloader, further back from the breech-block. A large lever on the side of the autoloader casing cocked the rammer spring and opened the breechblock. The rounds were pushed down until the bottom round rested on the loading tray. The gun was now ready to fire. As soon as the foot pedal was pressed, the rammer was released and it projected the round into the breech, causing the breech block to close and releasing the striker which fired the round.
The recoil was then used to eject the spent cartridge case, cock the rammer, and feed down another round on to the loading tray. If the gun was at auto and the pedal was still pressed this would again fire the gun and repeat the cycle at the rate of 2 rounds per second. So a clip every two seconds had to be fed into the autoloader when firing at full auto! After each round was fired, the cartridge case was ejected back over the loading tray and out through an opening at the rear of the breech casing. There it was channelled into a deflector and its momentum carried it on to be ejected in front of the gun.
Two versions of the Bofors gun existed, mobile and static. The static gun was bolted directly to a holdfast which was embedded in concrete, mostly around the Grand Harbour. The mobile version, which was identical, was instead bolted on to a four-wheeled carriage, the Platform, which was towed by a truck. When deployed two outrigger arms were extended to form a cross-shaped base with levelling jacks at each extremity, and the wheels were raised ( Mk 1 platform ) or removed ( Mk 2 ).


Ammunition
The projectiles used against aircraft were high-explosive shells fitted with an impact fuse. Each shell had, at the rear end, a small compartment filled with tracer element. This ignited on firing and allowed the layers to follow the flight of the shells towards the target, and correct as necessary. If the target was not hit, the shell would explode when the tracer element burnt out, by which time the shell would be well on its way back to earth. This was done to avoid the shell exploding on the ground and causing us casualties and damage.
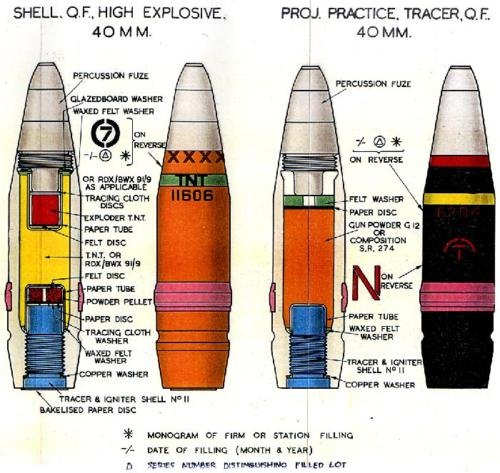
High explosive and tracer ammunition used for the Bofors AA-gun
The Bofors gun was capable of firing at a rate of 120 rounds per minute. The shell itself was 40mm in diameter, 180mm long and weighed nearly 1 kilo. The destructive power of this shell was superior to a hand grenade. Due to the high rate of fire, the barrel would tend to overheat. So the ‘spittle test’ would be performed and if the drops of spittle were seen to jump about, “change barrels” was ordered, Each gun had a spare barrel and this would be exchanged with the hot one to enable the gun to continue firing. Due to the intensity of the enemy’s air attacks, the static guns around Grand Harbour were issued with an extra spare barrel!
Tactical Use
The gun was an efficient anti-aircraft weapon designed to independently engage aircraft flying below 2,000 feet at speeds of up to 300 miles per hour. When the Box Barrage was put into operation during the ‘Illustrious’ blitz of 1941, the Bofors guns were used to engage those enemy planes which dared to dive through.
In simple terms a box barrage entailed a group of heavy AA guns ( 3, 3.7 and 4.5 inch) all firing in a fixed general direction. Bearing and elevation and fuse settings would have been worked out for each gun, so that all the shells would be exploding in the same area forming a “box” of explosions and shrapnel, making it almost impossible for an enemy plane to pass through unharmed.
“16th January,1330hrs
44 Ju87s and 17 Ju88s escorted by 20 Me110s, 20 Mc200s and 10 CR42s attacked the Illustrious. The formidable box barrage put up by the harbour defence, manned by Maltese and British gunners as well as Dockyard volunteers supplemented with guns brought in from the airfields created confusion amongst the attackers. The gunners held their positions as bombs rained down around them. So intense was the barrage that, despite the determination of the German pilots to press home their attacks, only one bomb hit the Illustrious deck with the remaining bombs falling in and around the Harbour area. After releasing their bombs the Stukas pulled away, at a level below the bastions, where the guns obviously couldn’t be lowered due to the buildings. They were also met by the 2 Gladiators, 3 Fulmars now stationed at Hal Far and 4 Hurricanes from Ta’ Qali. 60 civilians were killed during this raid and the church of St. Lawrence received a direct hit. Several persons were later rescued from under the debris by ARP personnel and other volunteers. Ten aircraft were claimed to have been shot down.”